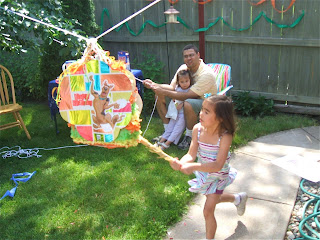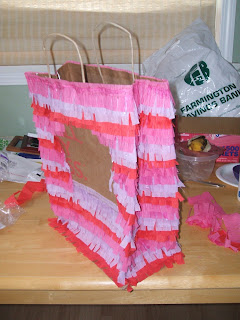
My friend from Costa Rica taught me how to make this home-made pinata using a Target brown paper bag, a poster board, a Mylar balloon, tape, Elmer's glue, crepe paper(streamers), staples, and string.

On my second pinata, I made the character cardboard cut-out a little smaller so that more of the colorful crepe paper and paper bag would be exposed to make it easier to break open.

First you need to find a pot lid or a bowl lid that is the exact size you want your character cut out to be in the front and back of the pinata. It can't be bigger than the Mylar balloon. (Make sure you get a Mylar balloon that has two sides or you will need to buy two balloons so you have a picture for the front and back). Cut the balloon around the edge to separate the balloon back and front.

Trace your lid two times on the poster board so that you have two large circles. (You may need two poster boards depending on the size of your lid you are tracing and the size of the poster). Then, using the small semi-circle, trace a scallop edge on the inside of your circle. I used a smaller scalloped edge, but you can make your semi-circle any size you want for a larger scallop. (See the Scooby Doo pinata at the top for a larger scallop look).

Cut out both of your scalloped circles and place on the back of one of your Mylar balloon halves. Wrap the balloon around the scalloped edges and tape down. Pull tight so that the front of the balloon doesn't wrinkle.

In the inner part of your scallops you will need to cut a small slit to allow you to tape the balloon flat around the curved edges.

Repeat the process so that you have two balloon-covered poster cut-outs when you are done. Making these cut-outs can be time consuming, so you may want to break up the project and make the cut-outs one day and then proceed to the next step of decorating the bag with crepe paper another day. Another quicker option is to buy large paper plates featuring the character of your choice and use those as your cut-outs for the front and back of the pinata instead of making your own with the balloon. The only draw back is that the paper plates are usually pretty small.

The next step is to staple a piece of twine or string along the outside of the bag to help hold the weight of the candy.

Start at the top of one side, bringing the string around the bottom of the bag and to the top of the other side of the bag. Staple at the top and bottom of each side of the bag.

Staple a second piece of string next to the first, going under the bottom of the bag and to the other side, so you have two pieces of string running along the sides and under the bag a few inches apart.

Next, wind you crepe paper around and around until you have a 9 inch wide flat stack of crepe paper.

You are now going to cut the decorative fringe by starting at the two ends. Find the center layer and carefully put your scissors through the loop and snip 2/3 of the way to the top of each folded end.

Then finish cutting the fringe by cutting through all the layers 2/3 of the way to the top spacing your cut a little less than an inch apart.

Now you can start gluing the the crepe paper to the bag, starting at the bottom of the bag and working your way up.

If you are using several colors of crepe paper, glue down two rows of each color all the way around the bag and then proceed to the next color. Continue this pattern all the way to the top.

Put some tape on the back of each of the cut-outs and tape in place on the front and back side of the decorated bag.

Tie the string together at the top where the handles meet to help reinforce the weight of the candy when hanging and to prevent the handles from breaking.

To decorate the bottom of the bag I just glued long strips of the leftover streamers (not the fringed cut pieces) on the bottom, scrunching them up to make a textured look as I glued it down.


5 comments:
Wow!
Thanks for the post of instructions on how to make a pinata.
My kids love them, and this is such a fun way to tailor it to their specific interests.
Thanks.
So good to see you posting.
Hope your summer has been fabulous.
What an awesome idea! Thanks!
Thank you for an excellent idea! Simple, and inexpensive.
Greetings Amy and readers!
This affair is completely attractive owing to the fact that, it is to be done at home, sharing such a charming time with children.
I wish there were many more columns like this wonderful stuff and less Generic Viagra
advertisements. By the way, I love handcrafts so much!
Regards!
Thank you for this great idea. I made a pinata over lunchbreak using stuff I had at home. I hope it works!
Post a Comment